ZFS outages and being properly alerted

I recently discovered that I had a faulted zpool on a server in my house.

I believe that this is partly my own fault because a disc in a raidz failed, I didn’t notice and then a powercycling event caused some corruption to the other two discs.

This post is not about that; this is about the systems I’m putting in place in the future to prevent a similar thing from occurring.

My main mistake was failing to understand that a zpool can be degraded but still online. I wrongly assumed it would enter some kind of read-only mode once a disc had failed (of course I didn’t truly expect a disk to fail either) and at that point I’d take some action.

I realised I need some kind of alerting to prevent me from missing an event like this again but I was also conscious that given I missed this event I might also miss a fault in the alerting system itself.

Therefore I decided to use a 3rd party system on the basis that a hosted solution might be more resilient to my own neglect on a non-mission critical server at home. I was also keen not to be totally locked in to some 3rd party solution or to feel like I’d given up too much privacy or autonomy in the solution.

The solution I came up with looks like this:

  • Run a dockerised version of Prometheus locally on the server
  • Run a dockerised version of Prometheus Node Exporter on the server. The node exporter handily creates metrics on zpool health
  • Use the remote write functionality of Prometheus to write a select set of metrics to the free tier of Grafana Cloud
  • Fire alerts from Grafana Cloud to an email address I check regularly

This left me with docker compose config like this:

# docker-compose.yml
networks:
  monitoring:
    driver: bridge

volumes:
  prometheus_data: {}

services:
  node-exporter:
    image: prom/node-exporter:latest
    container_name: node-exporter
    restart: unless-stopped
    volumes:
      - /proc:/host/proc:ro
      - /sys:/host/sys:ro
      - /:/rootfs:ro
    command:
      - '--path.procfs=/host/proc'
      - '--path.rootfs=/rootfs'
      - '--path.sysfs=/host/sys'
      - '--collector.filesystem.mount-points-exclude=^/(sys|proc|dev|host|etc)($$|/)'
    expose:
      - 9100
    networks:
      - monitoring

  prometheus:
    image: prom/prometheus:latest
    container_name: prometheus
    restart: unless-stopped
    volumes:
      - ./prometheus.yml:/etc/prometheus/prometheus.yml
      - prometheus_data:/prometheus
    command:
      - '--config.file=/etc/prometheus/prometheus.yml'
      - '--storage.tsdb.path=/prometheus'
      - '--web.console.libraries=/etc/prometheus/console_libraries'
      - '--web.console.templates=/etc/prometheus/consoles'
      - '--web.enable-lifecycle'
    expose:
      - 9090
    networks:
      - monitoring

And a prometheus yaml like this:

# prometheus.yml
global:
  scrape_interval: 1m

scrape_configs:
  - job_name: 'prometheus'
    scrape_interval: 1m
    static_configs:
      - targets: ['localhost:9090']

  - job_name: 'node'
    static_configs:
      - targets: ['node-exporter:9100']

remote_write:
  - url: https://<redacted>.grafana.net/api/prom/push
    basic_auth:
      username: <username>
      password: <password>
    write_relabel_configs:
      - source_labels: [__name__]
        regex: "node_zfs_zpool_state"
        action: keep

I then simulated a couple of outage conditions with docker compose down on the prometheus stack and zpool offline zpool <disc-name> to create a degraded zpool.

In both cases I got alerts in my email.

I’m happy with this outcome because:

  • It removes the risk of me screwing up the monitoring and then not getting an alert
    • (yes, there’s a risk that grafana cloud stops)
  • I’m using off the shelf prometheus and node exporter so switching to an alternative cloud platform should be easy if needed
  • I can also collect metrics locally
  • I don’t need to ship lots of information about my server to Grafana like I would if I used alloy in its default config

Fixing Karcher WV2 Plus

My parents had two of Karcher window vacs after they lost a charger or one of them broke. I took one, without a charger off their hands. It wasn’t totally broken but on pressing the button it only ran for a second or two before turning off

I promptly ordered a charger from ebay. Once it arrived and I plugged it in I found that the green status led in the handle blinked a bit. And then promptly started blinking very rapidly which suggested to me it wasn’t happy. This was reinforced by the fact that once I unplugged it the blinking continued.

After doing some googleing and watching a couple of youtube videos I convinced myself it was worth taking apart to try and fix. It seemed like a common problem was a corroded battery due to water ingress which people readily solved by replacing the battery.

I made my second investment of this project and got a set of long shafted precision torx screwdrivers from screwfix and took the thing apart.

Disassembly was relatively easy.

Remove the top wiper part by pressing the buttons on the side and then remove the water collection bottle.
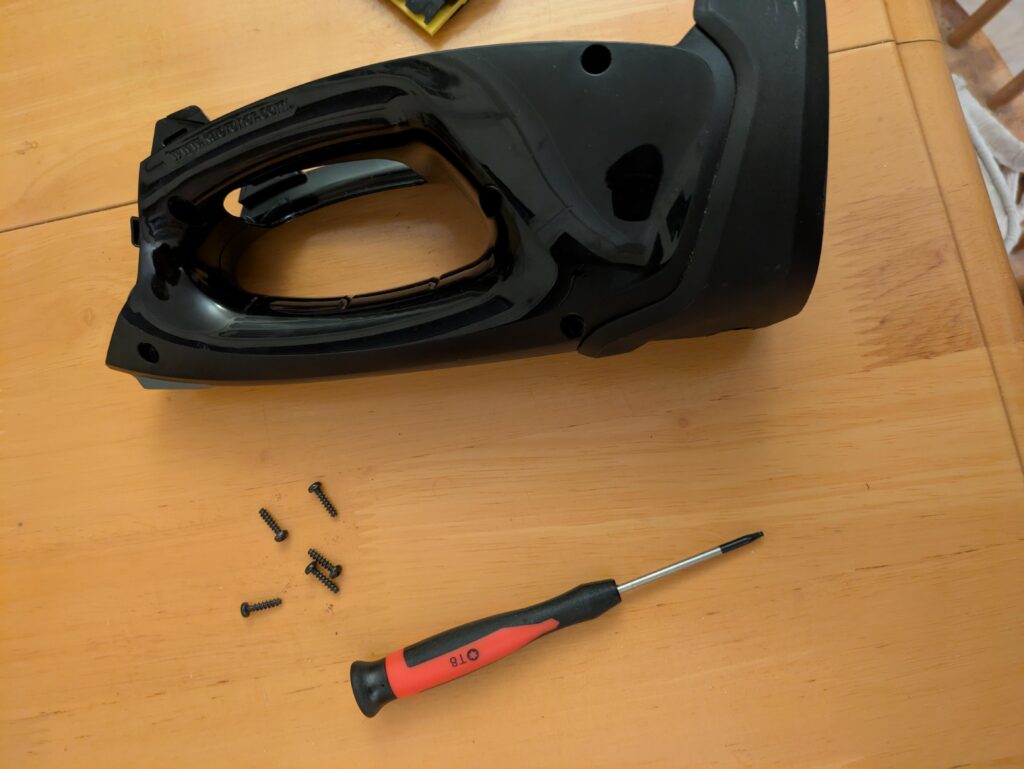
Remove all the screws using a T8 screwdriver. Some are fairly recessed.
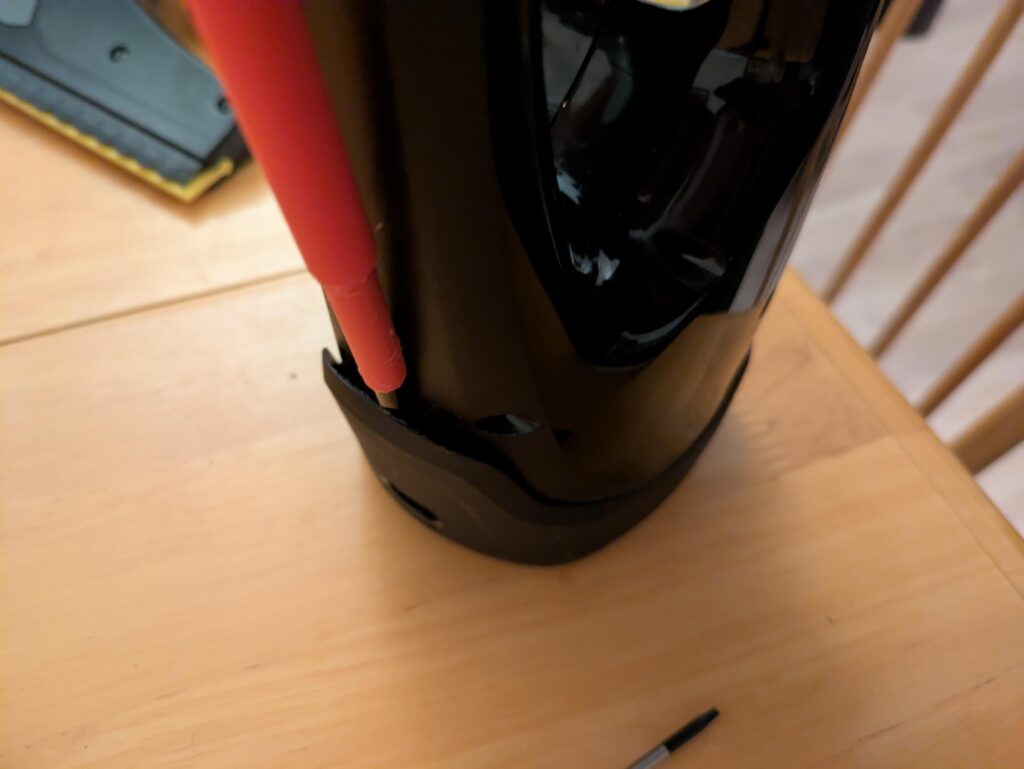
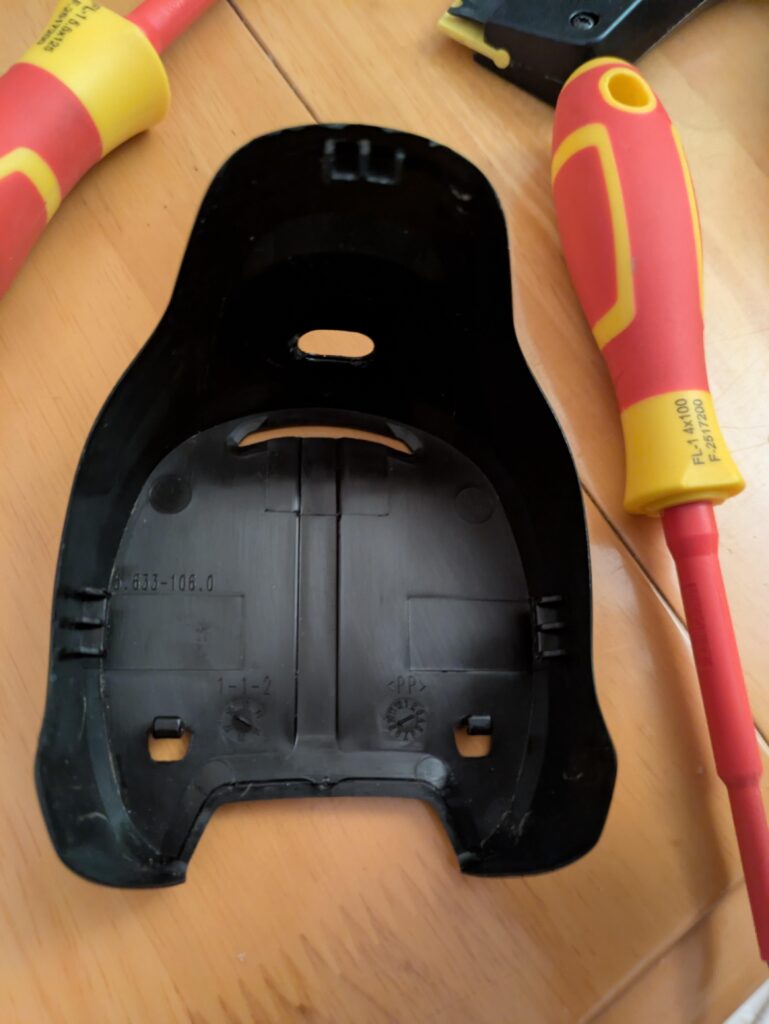
Remove the bottom by disengaging the three retaining clips with a screw driver. There is one on the back and one on each side.
Once removed you can clearly see the clips
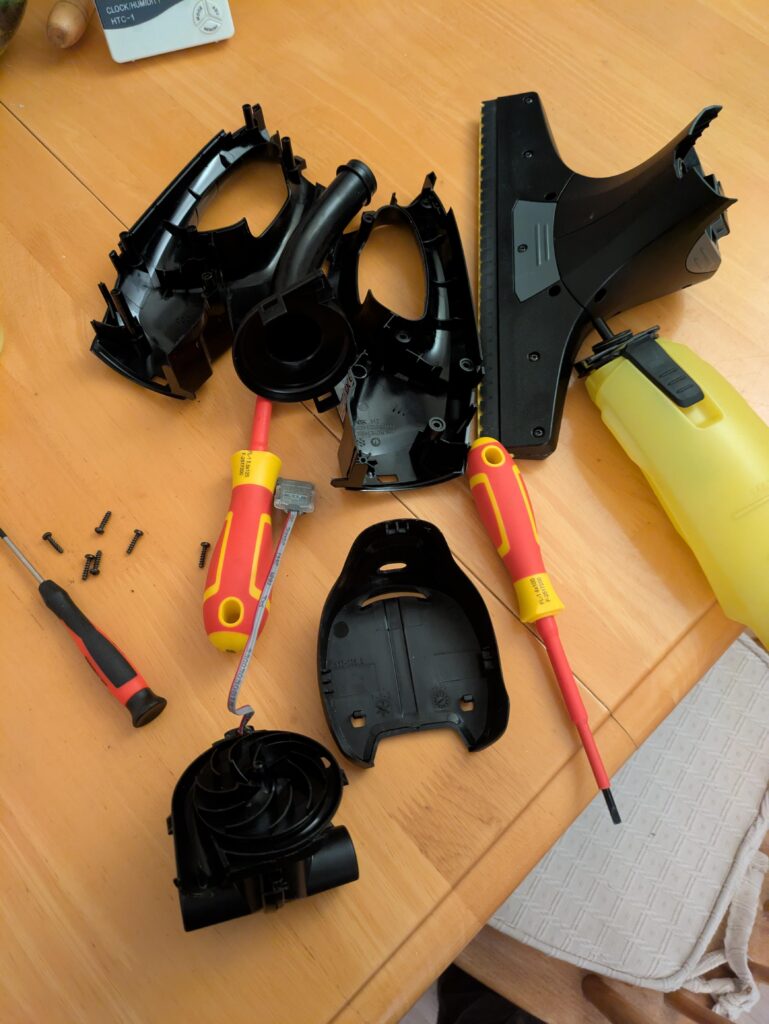
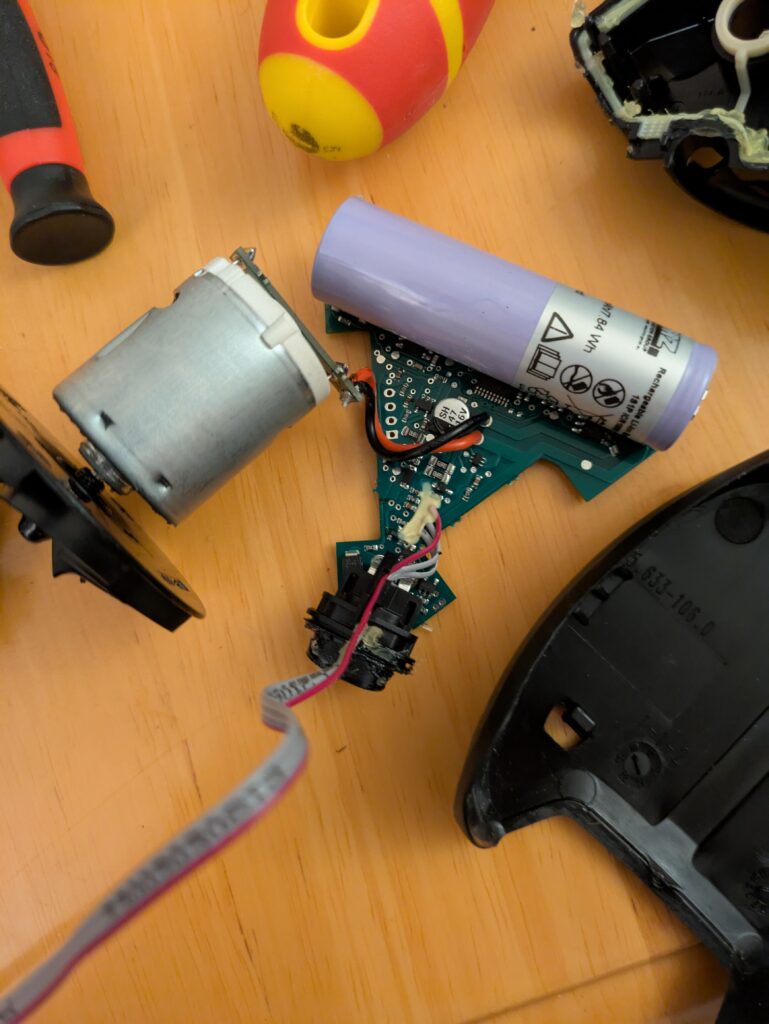
This reveals the suction tube, the two sides of the outer case and the bit were interested in the sealed motor housing and battery.
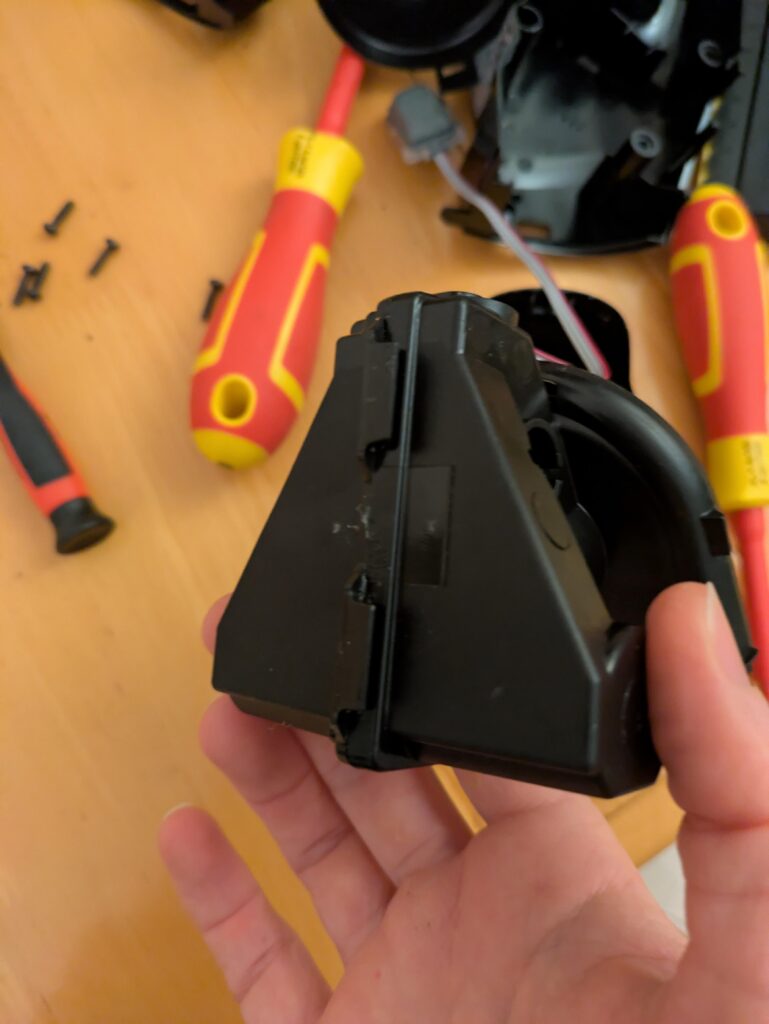
Motor housing in detail. Clips to open are shown on the sides
The pcb with soldered on battery and motor
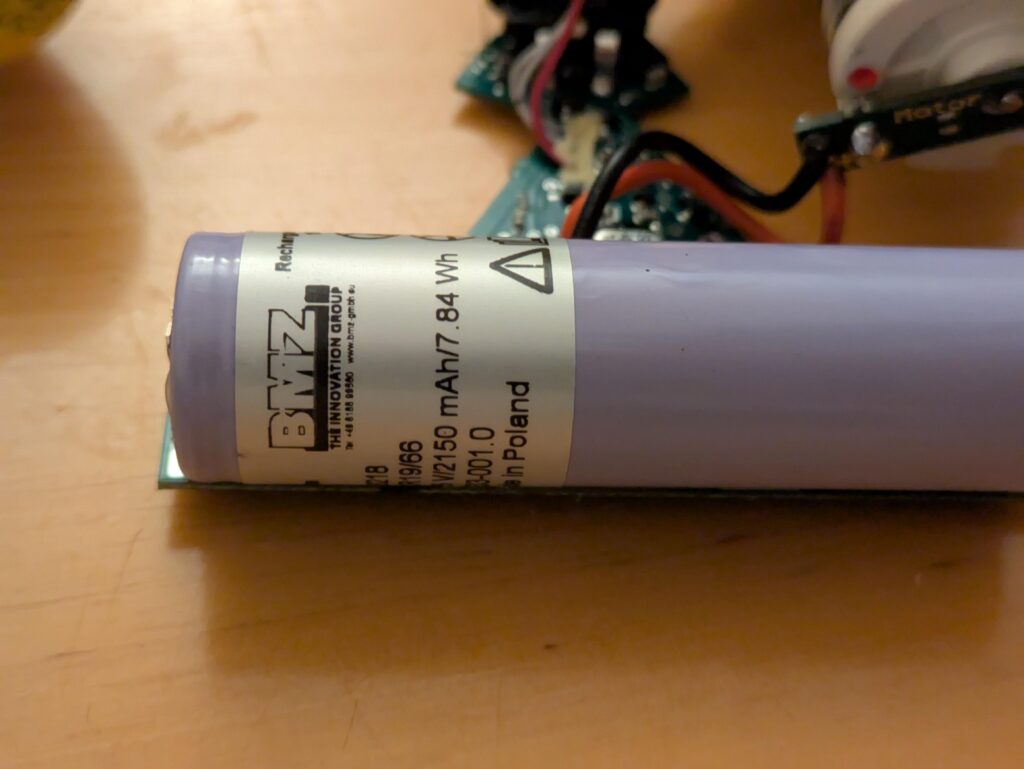
The 18650 battery in close up. Not damaged or corroded as expected.

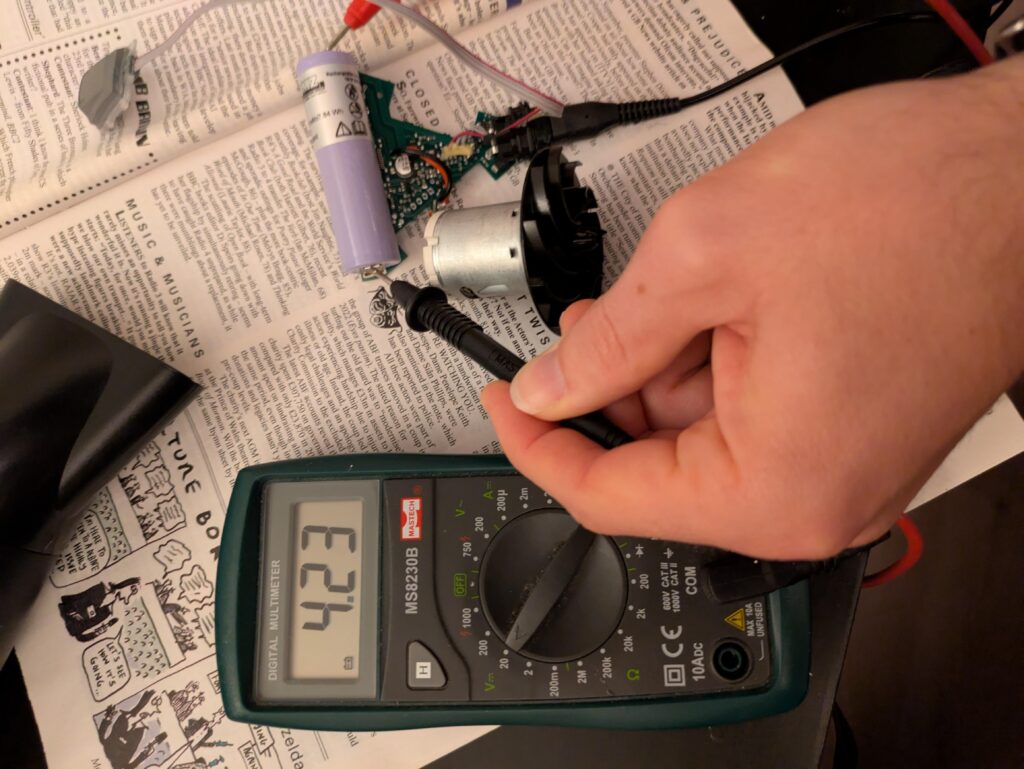
So what was the issue? It seems the issue is probably that the battery had over discharged and the charging circuitry was now refusing to charge it from such a low starting point. I stuck a volt meter on it and saw it was down to around 2.90V. It should be 4.2V fully charged and probably at least 3.6V.

At this point I could have resorted to the same solution that other people did with corroded cells: just swap them out but then I’d have to spend more money on ordering a new one and make sure it had tabs in the right place etc. I decided I’d get creative.

I hoped that just upping the voltage a little bit would convince the cell to start charging. I naively tried to do this my heating the cell with a hairdryer. This did indeed seem to trick the cell into charging with the charger. I could now see a charging voltage being put across the cell and the green light was merrily blinking away.

Heating with a hairdryer and now seeing it charge!

Sadly as it cooled down my fast blinking LED returned and it was no longer charging. I actually spent a while trying to keep it at a sweet spot temperature: warm enough to charge but cool enough I wasn’t too worried about starting a Lithium battery fire. Interestingly this didn’t work and actually after trying to keep this up for a while my cell was now down to 2.86V.

I’d just about given up and was thinking about ordering a new cell to solder on when I remembered we had an 18650 battery charger we’d used in the past for torches. I hoped this was suitably “dumb” to not care about the low voltage and that it would fit without desoldering anything.

Happily it did! Given a few hours to get it back up to voltage and then some reassembly and I have a working window vacuum with no soldering required!

Noisy Dell R330

I recently purchased an old dell r330 server for use as part of a homelab. I have it running in the loft but not super far from where I sleep.

I was worried about the level of noise and struggled to find much information about how loud it would be. I read comments varying from insanely noisy to barely noticeable.

To put a small bit of detail online for people who might also google this. I found it very noisy indeed on start up. The fans appear to run at full tilt before an OS is loaded.

Once my OS was installed it dropped to a very manageable level but was still too loud for me to sleep near. I discovered this was due to a single particularly noisy fan of the 4 that were installed.

I tried removing this fan but that appear to make the system unhappy (not hot) and caused the other fans to run again at high speed and too noisy.

I realised this fan was vibrating simply by touching each fan individually as they ran. Once was clearly far more violently vibrating than the others. I initially thought that I would need to replace the fan.

However I was happy (?) to discover that it was actually insanely dirty and a clear of the blades with IPA and papertowels/a small stick seems to have rebalanced the fan and returned it to the volume of all the others.

I am now happily able to sleep with it on and as a light sleeper generally this means that (at low load/temp) I would describe it as not excessively loud for home use.

Porting Wikidata Userscripts to Tampermonkey for use on other Wikibases

On Wikidata a number of very convenient user features are lacking from the core Wikibase codebase (e.g. Merge) and instead users have independently built these using Gadgets and Userscripts.

This is all well and good but it means that users on other Wikibases are then missing this functionality at all. They might try to copy these userscripts across but this brings issues with keeping the scripts and their modifications up to date. In fact the default setting for Mediawiki is to disable user js. This means that it’s not possible to simply copy the same works flow as on Wikidata (or Wikipedia, meta etc.). Finally even if this is possible these userscripts then do not work when logged out.

Luckily browser extensions for users to manage custom JS to modify sites have been around since 2004!

This post looks at the small amount of work necessary to port a userscript (like one might reference in their own common.js file on Wikidata) to a script the can be used with tampermoney; one of the more popular browser extensions for managing these userscripts.

How to install Tampermonkey

This is a browser extension available for both Chrome and Firefox. You can read the installation instructions here.

How to create a blank Tampermonkey script and set metadata

Click the new script button and fill in the details like the author. I like to credit the existing authors even if the license for the script I’m going to be including doesn’t require me to (for example it’s CC0).

How to adjust scripts written for MediaWiki to be injected by tampermonkey

Many MediaWiki userscripts rely on the window.MediaWiki object that is present very quickly after loading a page. Tampermonkey however immediately executes it’s script. Therefore it’s probably necessary to wrap the userscript you’ve copied from Wikidata in some logic to delay it’s execution until the MediaWiki object is available and it’s possible to use.

I’ve found a good starting point is as follows:

function waitForMediaWikiToExist(){
    if(typeof window.mw.loader.using !== "undefined"){
        <normal entry point here>
    }
    else{
        setTimeout(waitForMediaWikiToExist, 250);
    }
}

waitForMediaWikiToExist()

Adjust hardcoded values where necessary

This may mean removing explicit reference to Wikidata or things like namespace ids that may be wrong (e.g. 0 vs 120 for the item namespace which is the default).

Outcome

You can see an example of porting the previously mentioned Merge.js at this github gist.

Using tmux mouse mode on wayland

Tmux mouse mode can be enabled by setting set -g mouse on in your tmux settings file. This is probably at ~/.tmux.conf . You can reload this in tmux to rapidly try different settings using tmux source-file ~/.tmux.conf to load it.

I found in mouse mode copy-paste into the “primary” buffer on wayland (on Fedora 40) wasn’t working as I desired. I wanted to copy into the buffer just by selecting text and paste using middle click.

This worked fine inside pure tmux, and also fine purely outside tmux but crossing over didn’t work. That is: selecting something outside of tmux and then middle clicking inside it just pasted whatever was left over in the tmux buffer; selecting something in tmux and then middling clicking outside (e.g. in firefox) just pasted whatever was left over in the main wayland buffer.

The solution for me was to set:

set -s copy-command 'wl-copy'

bind -n MouseDown2Pane run "tmux set-buffer -b primary_selection \"$(wl-paste -p)\"; tmux paste-buffer -b primary_selection; tmux delete-buffer -b primary_selection"


This was inspired by a blog from someone named Sean which has a slightly more complex version and works using X11.

My investigations lead me to the wl-copy and wl-paste utilities which you might also find interesting / convenient if your workflow involves lots of copy and paste between places.

Django, Maria and Wikimedia Toolforge

I’m maintaining a tool called Fatameh on Wikimedia’s toolforge.

It’s a simple Django application that creates Wikidata items for users using OAuth. The idea is to let people make items for any academic paper just by providing an identifier.

It became popular as time went by and out-grew the sqlite backend. It was causing too much disk IO and so needed to be moved to the managed tools MariaDB cluster.

I’m a Django newbie and so something that I thought would be simple turned out not to be. Finding a suitable driver for MariaDB for my needs was harder than I thought.

Firstly it has to support the flavours of python and Django I was using. Specifically python 3 and Django 1.11.x

It then had the added complication that it would be run on the toolsforge kubernetes infrastructure in a special python 3 container. This is fairly cut down container that importantly doesn’t come with libmysqlclient. Unfortunately it seems of the three proposed drivers on the Django docs this restricts me to just one possibility: the mysql-connector library from oracle.

I try to add that using pip into my virtualenv: `pip install mysql-connector`

After some head scratching about a missing ProtoBuf library that I didn’t realise I needed it turns out that ‘mysql-connector’ isn’t the official library from oracle about provided by a 3rd party. This is always a problem when the official / bigger project get late to the party and hasn’t bagged the right name.

The official one seems to be `mysql-connector-python` but pip doesn’t actually have any versioned packages attached to this name it’s just a stub. Finally I realise it is called `mysql-connector-python-rf`.

This however *still* doesn’t work. Apparently it isn’t quite suited to Django 1.11 and only works with older versions. However yet more googling later I find some kind soul has written a few lines patch to make it play ball: mysql-connector-python

In the end this is what I used and it seems to work for now. Ideally we’ll move to the official oracle version if/when then they include this (simple looking to me) change for working with current Django.

I found it very surprising that using one of the most popular DBs with one the most popular frameworks was such a hassle and required finally using some 3rd party patch to make it all go.

Perhaps I missed something: all the django people I spoke to told me to use postgres instead or maybe it’s actually unusual for people to be without libmysqlclient. Either way, maybe this post will save the next uninitiated person the day I spent figuring this all out.

Running your own Wikibase SPARQL endpoint

As I mentioned before I was struggling to setup a functioning SPARQL endpoint for the Wikibase installation at librarybase.wmflabs.org. However, this struggle now appears to be at an end and has now been (basically) successfully functioning for over a week.

It turns out the reason for the updater failing was quite complex and interesting. I go on to describe what I believe the problem was.

Fundamentally the problem stemmed from the SPARQL endpoint returning unexpected responses to query’s similar to this:

SELECT DISTINCT ?s WHERE { 
  VALUES (?s ?rev) { 
    ( <http://librarybase.wmflabs.org/entity/Q64433> 4325 ) } 
  OPTIONAL { 
     ?s <http://schema.org/version> ?repoRev 
  } 
  FILTER (!bound(?repoRev) || ?repoRev < ?rev) 
}

The idea behind this query is to test each pair of URI and integer in the values section against the criteria in the FILTER block. The idea is to test if the triple store of the SPARQL end point stores a version number for the given URI and then to test if it is less than the integer provided in the values section. If the triple store value is less or it doesn’t exist at all the query should return the URI. If a list of URIs is provided it should return a list of URIs meeting this criteria.

This is how the endpoint updater identified entities for which new data was available. However the end point was actually returning a large list of URIs. This was because it was treating the URI in the values section as UNDEF if it wasn’t already in the triple store. Therefore it only tried to match the ‘version’ integer part of the VALUES section and typically this could match many subjects, including some that were not of the form http://librarybase.wmflabs.org/entity/Q123. Because the data returned from this query was not checked for validity it tried to perform changes on on objects which don’t exist (hence the NullPointer exception I described earlier). I think because it determines what needs changing based on simple string  operations on the URI(s) it gets back.

The next question is why the query engine treated URIs not in the triple store as UNDEF.  It didn’t seem to be a problem for an endpoint running the same code available at http://query.wikidata.org (the WDQS). That was until I started playing around with the query, and submitted a similar one. In order to test for an entity I knew to not exist I entered a keymash of digits for it’s ID. Luckily I accidentally also struck the q key in this process (e.g. <http://www.wikidata.org/entity/Q12345q12345>). This gave me a similar situation from WDQS; a long list of URIs I hadn’t put in my VALUES section. Of course this an invalid ID and if you follow it you get HTTP error 400 (Bad request)

This meant that somehow the endpoint (which I assumed was isolated from the world) ‘knew’ which entities where good and which were bad. I realised that on libraybase (as with any vanilla Wikibase installation) www.site.org/entity/Q123 didn’t actually go anywhere; it only works on www.wikidata.org and test.wikidata.org because there is a a URL rewrite in place to take you to: https://www.wikidata.org/wiki/Special:EntityData/Q123.

I fixed this by putting a rewrite in place on the librarybase webserver but the problem still existed. I then approached Stas Malyshev with this information (the main author of the WDQS endpoint code) and head realised that there was a chance that there were some hardcoded references (in /common/src/main/java/org/wikidata/query/rdf/common/uri/WikibaseUris.java for those trying to make it work for themselves) in the endpoint rather than in the updater to make it handle Wikidata URIs differently. Changing these to librarybase.wmflabs.org and rebuilding meant everything suddenly started working perfectly!

All in all a rather complicated puzzle but one I was very thankful to have solved so I could move on with importing data into Librarybase.

Importing EPMC data to Wikidata (or similar)

Aiming to import metadata about all articles that have a PMCID appearing in wikipedia to librarybase.wmflabs.org. This is a wikibase installation which is the same software that wikidata.org runs.

Metadata are obtained from the EuropePMC RESTFUL api using a custom python library written by me. It is available at https://github.com/tarrow/epmclib.

This is then pushed to the wikibase installation using a custom script (also written by me) utilizing a python library for interacting with wikibase installations. My script(s) will be available at https://github.com/tarrow/librarybase-pwb. The external library is called pywikibot and is available at https://github.com/wikimedia/pywikibot-core.

The script I use also makes calls to a SPARQL endpoint which keeps a triple store of the data available in librarybase.wmflabs.org and is available at sparql.librarybase.wmflabs.org. Follow the 404 to get to the splash page. Keeping this data up to date is currently a problem because the updater periodically fails and a dump of triples has to be manually side loaded to get past the failing point. The code for the sparql end point is here: https://github.com/wikimedia/wikidata-query-rdf. Talk to me about how to set up if you’re interested. I’m still waiting to get the updater stable before I write up the documentation.

Data can’t really be pushed until the endpoint is functional so we can find what articles already exist and also link authors to multiple articles when the have an ORCID. I’m waiting to hear back from the maintainer of wikidata-query-rdf about how to make the updater not break.


Plans for the first week of december

This week I will be my 4th week at EuropePMC and I hope to achieve a huge amount.

I have two strands to the work I’ll be doing; 1) taking data from wikimedia community about EuropePMC and the papers contained within it. 2) Taking data from EuropePMC and try to make it more available to the wikimedia community.

I shall be further analysing the mwcites data; particularly trying to resolve the ID’s created therein. This will be done by revamping the crude epmclib utility I wrote earlier this month so that by default it caches data downloaded and then using it to resolve everything found. It may even be integrated into mwcites to do this automatically on analysing the dumps. I’ll have to have a think about it.

Hopefully I can then make a good judgement as to if the majority of the citations found are legitimate. If so I’ll then make some nice annotated plot.ly graphs of which citations were first cited when on wikipedia.

I’ll also be trying to get a working, continually updated sparql endpoint for librarybase working so that it can be quickly queried. If this is possible I should be able to finish work on the pywikibot script such that it can start putting all PMCIDs  and PMIDs that appear on wikipedia (according to mwcites) into librarybase.

Finally after discussions on Friday with Joe Wass from crossref I hope to perhaps roll out a live feed of citations from wikipedia recent changes that contain PMIDs/PMCIDs.